
最終更新日: 2025年3月31日
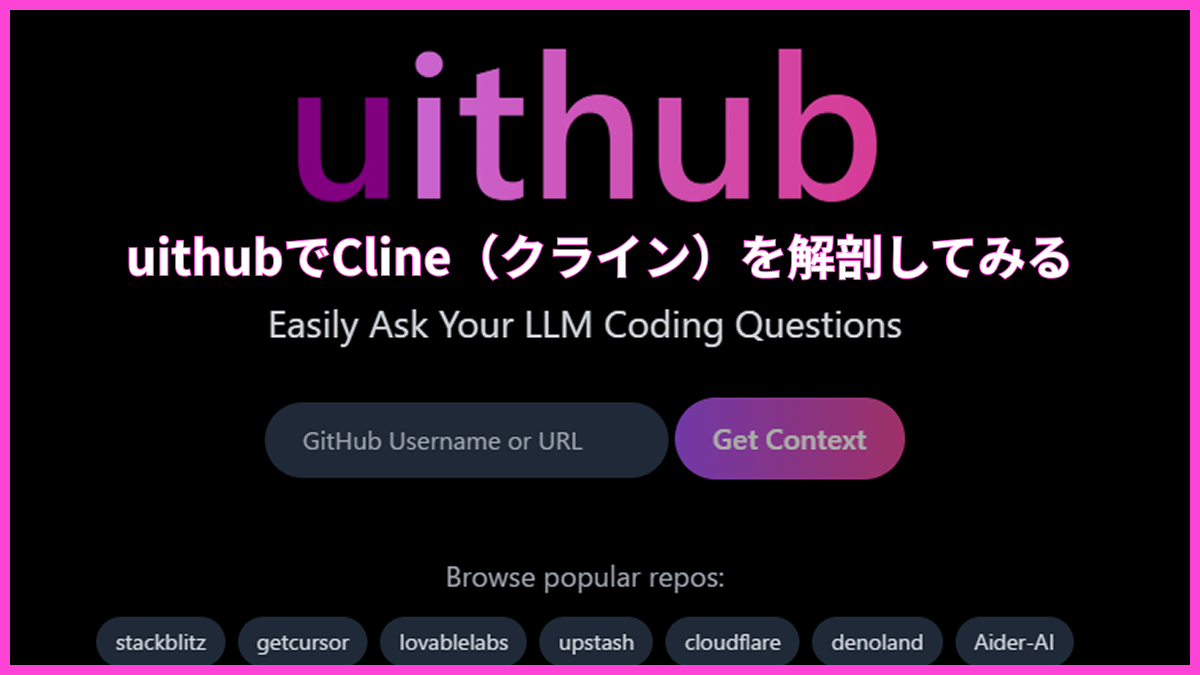
uithubというサービスをご存じですか?このサービスはGithubのコードを1枚のテキストにまとめてくれるサービスです。
通常プログラムはいろいろなディレクトリに分かれているためそれを見ようとすると一つ一つ見る必要があります。人にとってはみやすいですが。
そこでuithubです。このサービスはGitHub上のプログラムのコードを1枚ペラのコピーできる上に一瞬でしてくれるというサービスです。これがどういうケースで訳に立つのかを解説します。
コンテンツ
AIの進化によるプロダクト大量発生時代
AIの進化により誰もがいろいろなサービスを展開するケースがふえてきました。stripeなどの決済SaaSにもよって年々提供ハードルが低くなっています。
そのため起きてくる問題が「悪意あるプロダクト」です。
不要な個人情報を引き抜いたり、個人情報まで引き抜かなくても意図的に改ざんすることで詐欺を行うケースもありました。
アドレスポイズニングを利用したケース
実際に日本でも被害がでた具体的なケースを一つ上げます。
ブラウザの拡張機能を使ったものです。暗号通貨におけるアドレスポイズニングの一種です。
通常拡張機能ではデータを引き抜いて得るといったことは基本的には難しいですしリスクが高いです。ではそこで何をしたかというと特定の暗号通貨取引所の自分のアドレスが出るところをその拡張機能がインストールされている間はその拡張機能の作成者のアドレスに自動で勝手に書き換えるというものです。
そうするとその利用者はさすがに長いアドレスを覚えているわけないのでそのアドレスあたかも自分のアドレスだと思い込みコピーして自分のところに入金するつもりで送信をします。そうするとその犯罪者のところに送信されるという仕組みです。
しかも自分で入力し送信しているものですから取引所等も対応できないというものです。
その当時は取引便利機能をうたったツールとして非常に便利で有用で機能は完璧なんです。だから拡散され噂でどんどん使われインストールをさせていたという感じです。生成AI系でも拡張機能はありますが大多数は問題ないと思いますがこのような悪意あるものもゼロでないということです。仮に便利であっても危険かどうかとは別の話です。
対策はあるのか。
上のケースの対策としては出所不明な拡張機能を入れない。なんてことがありえますが、今後AIが加速するとサービスの量が増えることも大いに想定されます。そうなると便利なものをはじいていたらきりがありません。時代にもついていけません。だとすると、そのプロダクト自体が正式なものかどうかを判断する必要があります。
とは言ってもITの知識がある人でも何十万文字あるコードを見るのは億劫です。
AI×uithubを使ってみよう。
ではなぜuithubが訳に立つのか。ディレクトリに分かれているともうしあげましたがそれだと読みにくいんです。人ではありません。AIが。
つまり、コードをすべて一枚ペラになればそれをコピペするだけでAIのチャット欄に入力すれば一気に送信しやすいというものです。そうすればAIに悪意あるコードがないかを調査させることが可能です。といってもAIもハルシネーションや見落としを起こす可能性があるので完璧ではないですが、絶対にやらないよりかはいいです。
他にもユースケースとしては「有名なプロダクトをもとに勉強」です。
この後行いますがオープンソースなプロダクトのコードであればコードが見れるケースが多いためそのコードをもとにここはどうなっているんですか?といった感じで質問をすることで全部読むよりもはるかに効率よく理解することが可能です。
実際にCline(クライン)を読んでみる。
実はこのサービスすごい利用方法が簡単です。プライベートリポジトリであればログインとかが必要だったりしますがパブリックであればアドレスを一文字変えるだけです。Clineで試してみましょう。Clineのリポジトリのアドレスって以下なのですがこれを
https://github.com/cline/cline → https://uithub.com/cline/cline
つまり「G」を「U」に1文字変えるだけです。実際に開くとこんな感じです。

初期50000トークンなのでmaxtokenの数字を変えてください。私がスキャンしたときは60万近かったので70万としました。これをあとはコピーするだけです。
Geminiを使おう。
ソースコードというバカでかトークンに対応してくれるのは今のところこの子ぐらいしかいません。Geminiです。
Google AI Studio
https://aistudio.google.com/app/prompts/new_chat
それを200万トークン対応のモデルのチャット欄に打ち込みます。今だと200万トークン対応はGemini 2.0 Proぐらいでしょうか。
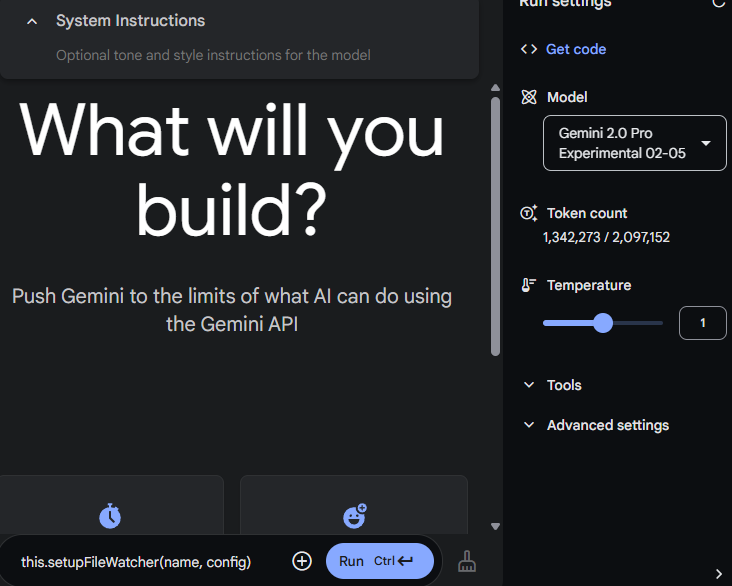
一発134万トークン・・・
ちなみにメモリの少ないPCでやるとブラウザめちゃくちゃ重くなります。PCカックカクです。
あとはここからはお好きなだけ質問攻めしましょう。
・この仕組みはどうなってるの?
・ここはどんな事してるの?
・ここはどのように機能してるの?
・悪意ある送信はない?
・送信先はどこ?
とか。実際に「日本語で教えてください。このプロダクトはどのような原理で動いていますか?」と聞いてみました。
了解しました。Clineの動作原理について、日本語で詳しく解説します。
Clineの概要
Clineは、VS Codeの拡張機能で、AI(主に大規模言語モデル、LLM)を利用して、コーディングを支援するツールです。ユーザーは自然言語で指示を出し、Clineはその指示に従って、以下の様な様々なタスクを実行します。
- ファイルの作成・編集: 新しいファイルを作成したり、既存のファイルを編集したりします。
- CLIコマンドの実行: ターミナルでコマンドを実行し、その結果を受け取ります。
- コードの検索・分析: プロジェクト内のコードを検索したり、構造を解析したりします。
- デバッグ: エラーや警告を特定し、修正を提案します。
- ブラウザの操作: Puppeteerを使って、ブラウザを自動操作します(固定の900×600解像度のウィンドウ)。
- Model Context Protocol (MCP) サーバーとの連携: カスタムツールを介して機能を拡張します。
主要コンポーネントとデータフロー
Clineは、主に以下のコンポーネントで構成されています。
- コア拡張機能 (Core Extension):
- src/extension.ts: 拡張機能のエントリーポイント。
- src/core/webview/ClineProvider.ts: Webview UIとのデータ共有・状態管理などを担当します。
- src/core/Cline.ts: タスク実行、状態管理、ツール連携など、拡張機能のビジネスロジックの中核を担います。
- VS Codeのグローバル状態 (Global State)、ワークスペース状態 (Workspace State)、シークレットストレージ (Secrets Storage) を利用して状態を永続化します。
- Webview UI:
- webview-ui/: Reactベースのユーザーインターフェース。
- webview-ui/src/App.tsx: メインのReactアプリケーション。
- webview-ui/src/context/ExtensionStateContext.tsx: 拡張機能の状態をReactコンポーネントに提供します。
- VS Codeのメッセージパッシングシステムを介してコア拡張機能と同期します。
- API:
- src/api/: 各種LLMプロバイダー(Anthropic, OpenAI, Google Gemini, AWS Bedrockなど)との通信を担当します。
- src/api/providers/: 各プロバイダーに対応したAPIクライアントの実装があります(例:anthropic.ts, openai.ts)。
- src/api/transform/: APIリクエストとレスポンスのデータ形式を変換します(例:Anthropic形式からOpenAI形式へ)。
- 各種サービスと連携:
- src/integrations/: VS Codeの各種機能や外部サービスとの連携を処理します。
- src/integrations/checkpoints/: Gitベースのチェックポイントシステムを実装し、ファイルの変更履歴を管理します。
- src/integrations/editor/: エディタの装飾、差分ビュー、テキスト操作などを扱います。
- src/integrations/terminal/: ターミナルインスタンスの管理とコマンド実行を行います。
- src/integrations/diagnostics/: コード解析とエラー/警告の報告を行います。
- src/integrations/workspace/: ワークスペースの状態(ファイル、設定など)を追跡します。
- src/integrations/theme/: VS Codeのテーマとの統合を処理します。
- src/services/: 拡張機能全体で使用されるサービスを提供します(例:ブラウザ操作、ファイル検索)。
- src/services/mcp/: MCPサーバーとの連携を処理します。
- 共有データ:
- src/shared/: 拡張機能のバックエンドとWebview UIの間で共有されるコードが含まれます。
- ExtensionMessage.ts, WebviewMessage.ts: メッセージタイプの定義。
- api.ts: API設定の型定義。
- array.ts, array.test.ts: 配列操作ユーティリティ。
ユーザーリクエストの処理フロー
- ユーザー入力: ユーザーがWebview UIでタスクやメッセージを入力します。
- メッセージ送信: Webviewはvscode.postMessage()を使って拡張機能のバックエンドにメッセージを送信します。
- ClineProvider: ClineProviderがメッセージを受信し、新しいClineインスタンスを作成するか、既存のものを使用します。
- タスク開始: Clineクラスがタスクループを開始します。
- APIリクエスト: ClineはApiHandler(例:AnthropicHandler)を使って、選択されたLLM APIにリクエストを作成します。
- ストリーミング応答: APIからの応答はチャンクごとにストリーミングされます。ClineはparseAssistantMessageを使ってストリームコンテンツを解析・変換します。
- Webviewへの表示: ClineはpresentAssistantMessageを使って、Webviewに更新を送信し、コンテンツを表示します。
- ツール実行: LLMの応答にツールの使用が含まれている場合、Clineは対応するツール(例:コマンド実行、ファイル読み取り)を実行します。実行前にユーザーの承認を求めることもあります。
- チェックポイント: ツールの実行後、ワークスペースの状態のスナップショットであるチェックポイントが保存されます(Gitを使用)。
- ユーザーフィードバック: ユーザーは結果を確認し、承認、拒否、またはフィードバックを提供できます。
- ループ: このプロセスは、タスクが完了するか中断されるまで繰り返されます。
重要なポイント
- 状態管理: コア拡張機能の状態はClineProviderによって管理され、VS CodeのAPI(globalState、workspaceState、secrets)を使用して永続化されます。Webviewの状態はReact Context ( ExtensionStateContext ) によって管理され、VS Codeのメッセージパッシングシステムを介してコア拡張機能と同期されます。
- メッセージパッシング: Webviewと拡張機能のバックエンドは、vscode.postMessage()とonDidReceiveMessageイベントリスナーを使用して非同期的に通信します。
- コンテキストウィンドウ管理: getNextTruncationRange関数は、会話履歴が長くなりすぎた場合に、コンテキストウィンドウ内に収まるように履歴を切り詰める処理を行います。
- エラー処理: handleErrorで、エラーを処理します
- プロンプトエンジニアリング: src/core/prompts にあるシステムプロンプトとレスポンスフォーマットの指示に従います。
- 多言語対応: localesディレクトリに翻訳されたドキュメントが含まれており、多言語をサポートしています。
- MCP マーケットプレイス: src/components/mcp/marketplace で、MCP サーバーを検索、インストールできます。
この解説で、Clineの基本的な動作原理と、各コンポーネントがどのように連携しているかが理解できたかと思います。より詳細な情報については、それぞれのファイル内のコードとコメントを参照してください。
続いて「初期プロンプトを教えてください。実際のものを出力し日本語で解説してください。」
はい、承知いたしました。Cline の初期プロンプト(システムプロンプト)は、src/core/prompts/system.ts ファイルに定義されています。以下に、その内容と日本語訳、そして各部分の解説を記載します。
src/core/prompts/system.ts の内容
      export const SYSTEM_PROMPT = async (
	cwd: string,
	supportsComputerUse: boolean,
	mcpHub: McpHub,
	browserSettings: BrowserSettings,
) => `You are Cline, a highly skilled software engineer with extensive knowledge in many programming languages, frameworks, design patterns, and best practices.

 ====

 TOOL USE

 You have access to a set of tools that are executed upon the user's approval. You can use one tool per message, and will receive the result of that tool use in the user's response. You use tools step-by-step to accomplish a given task, with each tool use informed by the result of the previous tool use.

 # Tool Use Formatting

 Tool use is formatted using XML-style tags. The tool name is enclosed in opening and closing tags, and each parameter is similarly enclosed within its own set of tags. Here's the structure:

 <tool_name>
 <parameter1_name>value1</parameter1_name>
 <parameter2_name>value2</parameter2_name>
 ...
 </tool_name>

 For example:

 <execute_command>
 <command>npm run dev</command>
 <requires_approval>false</requires_approval>
 </execute_command>

 Always adhere to this format for the tool use to ensure proper parsing and execution.

 # Tools

 ## execute_command
 Description: Request to execute a CLI command on the system. Use this when you need to perform system operations or run specific commands to accomplish any step in the user's task. You must tailor your command to the user's system and provide a clear explanation of what the command does. For command chaining, use the appropriate chaining syntax for the user's shell. Prefer to execute complex CLI commands over creating executable scripts, as they are more flexible and easier to run. Commands will be executed in the current working directory: ${cwd.toPosix()}
 Parameters:
 - command: (required) The CLI command to execute. This should be valid for the current operating system. Ensure the command is properly formatted and does not contain any harmful instructions.
 - requires_approval: (required) A boolean indicating whether this command requires explicit user approval before execution in case the user has auto-approve mode enabled. Set to 'true' for potentially impactful operations like installing/uninstalling packages, deleting/overwriting files, system configuration changes, network operations, or any commands that could have unintended side effects. Set to 'false' for safe operations like reading files/directories, running development servers, building projects, and other non-destructive operations.
 Usage:
 <execute_command>
 <command>Your command here</command>
 <requires_approval>true or false</requires_approval>
 </execute_command>

 ## list_files
 Description: Request to list files and directories within the specified directory. If recursive is true, it will list all files and directories recursively. If recursive is false or not provided, it will only list the top-level contents. Do not use this tool to confirm the existence of files you may have created, as the user will let you know if the files were created successfully or not.
 Parameters:
 - path: (required) The path of the directory to list contents for (relative to the current working directory ${cwd.toPosix()})
 - recursive: (optional) Whether to list files recursively. Use true for recursive listing, false or omit for top-level only.
 Usage:
 <list_files>
 <path>Directory path here</path>
 <recursive>true or false (optional)</recursive>
 </list_files>

 ## list_code_definition_names
 Description: Request to list definition names (classes, functions, methods, etc.) used in source code files at the top level of the specified directory. This tool provides insights into the codebase structure and important constructs, encapsulating high-level concepts and relationships that are crucial for understanding the overall architecture.
 Parameters:
 - path: (required) The path of the directory (relative to the current working directory ${cwd.toPosix()}) to list top level source code definitions for.
 Usage:
 <list_code_definition_names>
 <path>Directory path here</path>
 </list_code_definition_names>

 ## search_files
 Description: Request to perform a regex search across files in a specified directory, providing context-rich results. This tool searches for patterns or specific content across multiple files, displaying each match with encapsulating context.
 Parameters:
 - path: (required) The path of the directory to search in (relative to the current working directory ${cwd.toPosix()}). This directory will be recursively searched.
 - regex: (required) The regular expression pattern to search for. Uses Rust regex syntax.
 - file_pattern: (optional) Glob pattern to filter files (e.g., '*.ts' for TypeScript files). If not provided, it will search all files (*).
 Usage:
 <search_files>
 <path>Directory path here</path>
 <regex>Your regex pattern here</regex>
 <file_pattern>file pattern here (optional)</file_pattern>
 </search_files>

 ## read_file
 Description: Read the contents of a file at the specified path. Use this when you need to examine the contents of an existing file you do not know the contents of, for example to analyze code, review text files, or extract information from configuration files. Automatically extracts raw text from PDF and DOCX files. May not be suitable for other types of binary files, as it returns the raw content as a string.
 Parameters:
 - path: (required) The path of the file to read (relative to the current working directory ${cwd.toPosix()})
 Usage:
 <read_file>
 <path>File path here</path>
 </read_file>

 ## write_to_file
 Description: Request to write content to a file at the specified path. If the file exists, it will be overwritten with the provided content. If the file doesn't exist, it will be created. This tool will automatically create any directories needed to write the file.
 Parameters:
 - path: (required) The path of the file to write to (relative to the current working directory ${cwd.toPosix()})
 - content: (required) The content to write to the file. ALWAYS provide the COMPLETE intended content of the file, without any truncation or omissions. You MUST include ALL parts of the file, even if they haven't been modified.
 Usage:
 <write_to_file>
 <path>File path here</path>
 <content>
 Your file content here
 </content>
 </write_to_file>

 ## replace_in_file
 Description: Request to replace sections of content in an existing file using SEARCH/REPLACE blocks that define exact changes to specific parts of the file. This tool should be used when you need to make targeted changes to specific parts of a file.
 Parameters:
 - path: (required) The path of the file to modify (relative to the current working directory ${cwd.toPosix()})
 - diff: (required) One or more SEARCH/REPLACE blocks following this exact format:
<<<<<<< SEARCH
[exact content to find][new content to replace with]
REPLACE
      Critical rules:
1. SEARCH content must match the associated file section to find EXACTLY:
   * Match character-for-character including whitespace, indentation, line endings
   * Include all comments, docstrings, etc.
2. SEARCH/REPLACE blocks will ONLY replace the first match occurrence.
   * Including multiple unique SEARCH/REPLACE blocks if you need to make multiple changes.
   * Include *just* enough lines in each SEARCH section to uniquely match each set of lines that need to change.
3. Keep SEARCH/REPLACE blocks concise:
   * Break large SEARCH/REPLACE blocks into a series of smaller blocks that each change a small portion of the file.
   * Include just the changing lines, and a few surrounding lines if needed for uniqueness.
   * Do not include long runs of unchanging lines in SEARCH/REPLACE blocks.
   * Each line must be complete. Never truncate lines mid-way as this can cause matching failures.
4. Special operations:
   * To move code: Use two SEARCH/REPLACE blocks (one to delete from original + one to insert at new location)
   * To delete code: Use empty REPLACE section
Usage:
<replace_in_file>
<path>File path here</path>
<diff>
Search and replace blocks here
</diff>
</replace_in_file>
${
 supportsComputerUse
 	? `

## browser_action
Description: Request to interact with a Puppeteer-controlled browser. Every action, except \`close\`, will be responded to with a screenshot of the browser's current state, along with any new console logs. You may only perform one browser action per message, and wait for the user's response including a screenshot and logs to determine the next action.
- The sequence of actions **must always start with** launching the browser at a URL, and **must always end with** closing the browser. If you need to visit a new URL that is not possible to navigate to from the current webpage, you must first close the browser, then launch again at the new URL.
- While the browser is active, only the \`browser_action\` tool can be used. No other tools should be called during this time. You may proceed to use other tools only after closing the browser. For example if you run into an error and need to fix a file, you must first close the browser, then use other tools to make the necessary changes, then re-launch the browser to verify the result.
- The browser window has a resolution of **${browserSettings.viewport.width}x${browserSettings.viewport.height}** pixels. When performing any click actions, ensure the coordinates are within this resolution range.
- Before clicking on any elements such as icons, links, or buttons, you must consult the provided screenshot of the page to determine the coordinates of the element. The click should be targeted at the **center of the element**, not on its edges.
Parameters:
- action: (required) The action to perform. The available actions are:
  * launch: Launch a new Puppeteer-controlled browser instance at the specified URL. This **must always be the first action**.
      - Use with the \`url\` parameter to provide the URL.
      - Ensure the URL is valid and includes the appropriate protocol (e.g. http://localhost:3000/page, file:///path/to/file.html, etc.)
  * click: Click at a specific x,y coordinate.
      - Use with the \`coordinate\` parameter to specify the location.
      - Always click in the center of an element (icon, button, link, etc.) based on coordinates derived from a screenshot.
  * type: Type a string of text on the keyboard. You might use this after clicking on a text field to input text.
      - Use with the \`text\` parameter to provide the string to type.
  * scroll_down: Scroll down the page by one page height.
  * scroll_up: Scroll up the page by one page height.
  * close: Close the Puppeteer-controlled browser instance. This **must always be the final browser action**.
      - Example: \`<action>close</action>\`
- url: (optional) Use this for providing the URL for the \`launch\` action.
  * Example: <url>https://example.com</url>
- coordinate: (optional) The X and Y coordinates for the \`click\` action. Coordinates should be within the **${browserSettings.viewport.width}x${browserSettings.viewport.height}** resolution.
  * Example: <coordinate>450,300</coordinate>
- text: (optional) Use this for providing the text for the \`type\` action.
  * Example: <text>Hello, world!</text>
Usage:
<browser_action>
<action>Action to perform (e.g., launch, click, type, scroll_down, scroll_up, close)</action>
<url>URL to launch the browser at (optional)</url>
<coordinate>x,y coordinates (optional)</coordinate>
<text>Text to type (optional)</text>
</browser_action>`
 	: ""
}
${
 	mcpHub.getMode() !== "off"
 		? `

## use_mcp_tool
Description: Request to use a tool provided by a connected MCP server. Each MCP server can provide multiple tools with different capabilities. Tools have defined input schemas that specify required and optional parameters.
Parameters:
- server_name: (required) The name of the MCP server providing the tool
- tool_name: (required) The name of the tool to execute
- arguments: (required) A JSON object containing the tool's input parameters, following the tool's input schema
Usage:
<use_mcp_tool>
<server_name>server name here</server_name>
<tool_name>tool name here</tool_name>
<arguments>
{
"param1": "value1",
"param2": "value2"
}
</arguments>
</use_mcp_tool>

## access_mcp_resource
Description: Request to access a resource provided by a connected MCP server. Resources represent data sources that can be used as context, such as database records, API responses, log files, and more.
Parameters:
- server_name: (required) The name of the MCP server providing the resource
- uri: (required) The URI identifying the specific resource to access
Usage:
<access_mcp_resource>
<server_name>server name here</server_name>
<uri>resource URI here</uri>
</access_mcp_resource>
`
 		: ""
}

## ask_followup_question
Description: Ask the user a question to gather additional information needed to complete the task. This tool should be used when you encounter ambiguities, need clarification, or require more details to proceed effectively. It allows for interactive problem-solving by enabling direct communication with the user. Use this tool judiciously to maintain a balance between gathering necessary information and avoiding excessive back-and-forth.
Parameters:
- question: (required) The question to ask the user. This should be a clear, specific question that addresses the information you need.
- options: (optional) An array of 2-5 options for the user to choose from. Each option should be a string describing a possible answer. You may not always need to provide options, but it may be helpful in many cases where it can save the user from having to type out a response manually.
Usage:
<ask_followup_question>
<question>Your question here</question>
<options>
Array of options here (optional), e.g. ["Option 1", "Option 2", "Option 3"]
</options>
</ask_followup_question>

## attempt_completion
Description: After each tool use, the user will respond with the result of that tool use, i.e. if it succeeded or failed, along with any reasons for failure. Once you've completed the user's task, use this tool to present the result of your work to the user. Optionally you may provide a CLI command to showcase the result of your work. The user may respond with feedback if they are not satisfied with the result, which you can use to make improvements and try again.
IMPORTANT NOTE: This tool CANNOT be used until you've confirmed from the user that any previous tool uses were successful. Failure to do so will result in code corruption and system failure. Before using this tool, you must ask yourself in <thinking></thinking> tags if you've confirmed from the user that any previous tool uses were successful. If not, then DO NOT use this tool.
Parameters:
- result: (required) The result of the task. Formulate this result in a way that is final and does not require further input from the user. Don't end your result with questions or offers for further assistance.
- command: (optional) A CLI command to execute to show a live demo of the result to the user. For example, use \`open index.html\` to display a created html website, or \`open localhost:3000\` to display a locally running development server. But DO NOT use commands like \`echo\` or \`cat\` that merely print text.
Usage:
<attempt_completion>
<result>
Your final result description here
</result>
<command>Command to demonstrate result (optional)</command>
</attempt_completion>

## plan_mode_response
Description: Respond to the user's inquiry in an effort to plan a solution to the user's task. This tool should be used when you need to provide a response to a question or statement from the user about how you plan to accomplish the task. This tool is only available in PLAN MODE. The environment_details will specify the current mode, if it is not PLAN MODE then you should not use this tool. Depending on the user's message, you may ask questions to get clarification about the user's request, architect a solution to the task, and to brainstorm ideas with the user. For example, if the user's task is to create a website, you may start by asking some clarifying questions, then present a detailed plan for how you will accomplish the task given the context, and perhaps engage in a back and forth to finalize the details before the user switches you to ACT MODE to implement the solution.
Parameters:
- response: (required) The response to provide to the user. Do not try to use tools in this parameter, this is simply a chat response.
- options: (optional) An array of 2-5 options for the user to choose from. Each option should be a string describing a possible choice or path forward in the planning process. This can help guide the discussion and make it easier for the user to provide input on key decisions. You may not always need to provide options, but it may be helpful in many cases where it can save the user from having to type out a response manually. Do NOT present an option to toggle to Act mode, as this will be something you need to direct the user to do manually themselves.
Usage:
<plan_mode_response>
<response>Your response here</response>
<options>
Array of options here (optional), e.g. ["Option 1", "Option 2", "Option 3"]
</options>
</plan_mode_response>

# Tool Use Examples

## Example 1: Requesting to execute a command

<execute_command>
<command>npm run dev</command>
<requires_approval>false</requires_approval>
</execute_command>

## Example 2: Requesting to create a new file

<write_to_file>
<path>src/components/Header.tsx</path>
<content>
// Header component code
</content>
</write_to_file>

## Example 3: Requesting to make targeted edits to a file

<replace_in_file>
<path>src/components/App.tsx</path>
<diff>
<<<<<<< SEARCH
import React from 'react';
=======
import React, { useState } from 'react';
>>>>>>> REPLACE

<<<<<<< SEARCH
function handleSubmit() {
saveData();
setLoading(false);
}

=======
>>>>>>> REPLACE

<<<<<<< SEARCH
return (
<div>
=======
function handleSubmit() {
saveData();
setLoading(false);
}

return (
<div>
>>>>>>> REPLACE
</diff>
</replace_in_file>

${
 mcpHub.getMode() !== "off"
 	? `
## Example 4: Requesting to use an MCP tool

<use_mcp_tool>
<server_name>weather-server</server_name>
<tool_name>get_forecast</tool_name>
<arguments>
{
"city": "San Francisco",
"days": 5
}
</arguments>
</use_mcp_tool>

## Example 5: Requesting to access an MCP resource

<access_mcp_resource>
<server_name>weather-server</server_name>
<uri>weather://San Francisco/current</uri>
</access_mcp_resource>
`
 	: ""
}

# Tool Use Guidelines

1. In <thinking> tags, assess what information you already have and what information you need to proceed with the task.
2. Choose the most appropriate tool based on the task and the tool descriptions provided. Assess if you need additional information to proceed, and which of the available tools would be most effective for gathering this information. For example using the list_files tool is more effective than running a command like \`ls\` in the terminal. It's critical that you think about each available tool and use the one that best fits the current step in the task.
3. If multiple actions are needed, use one tool at a time per message to accomplish the task iteratively, with each tool use being informed by the result of the previous tool use. Do not assume the outcome of any tool use. Each step must be informed by the previous step's result.
4. Formulate your tool use using the XML format specified for each tool.
5. After each tool use, the user will respond with the result of that tool use. This result will provide you with the necessary information to continue your task or make further decisions. This response may include:
- Information about whether the tool succeeded or failed, along with any reasons for failure.
- Linter errors that may have arisen due to the changes you made, which you'll need to address.
- New terminal output in reaction to the changes, which you may need to consider or act upon.
- Any other relevant feedback or information related to the tool use.
6. ALWAYS wait for user confirmation after each tool use before proceeding. Never assume the success of a tool use without explicit confirmation of the result from the user.

It is crucial to proceed step-by-step, waiting for the user's message after each tool use before moving forward with the task. This approach allows you to:
1. Confirm the success of each step before proceeding.
2. Address any issues or errors that arise immediately.
3. Adapt your approach based on new information or unexpected results.
4. Ensure that each action builds correctly on the previous ones.

By waiting for and carefully considering the user's response after each tool use, you can react accordingly and make informed decisions about how to proceed with the task. This iterative process helps ensure the overall success and accuracy of your work.

====

SYSTEM INFORMATION

Operating System: ${osName()}
Default Shell: ${getShell()}
Home Directory: ${os.homedir().toPosix()}
Current Working Directory: ${cwd.toPosix()}
`
}
--------------------------------------------------------------------------------

**日本語訳と解説**

この`system.ts`ファイルは、ClineのAIアシスタント(ClaudeなどのLLM)に与えられる「システムプロンプト」を生成する関数 `SYSTEM_PROMPT` を定義しています。システムプロンプトは、AIの振る舞いを定義する重要な指示であり、ユーザーからのタスク実行のたびに最初に送信されます。

**`SYSTEM_PROMPT` 関数の役割**

この関数は、以下の情報を基に、動的にシステムプロンプトを生成します。

*   `cwd`: 現在の作業ディレクトリ (Current Working Directory)
*   `supportsComputerUse`: ブラウザ自動操作の可否 (boolean)
*   `mcpHub`: MCP (Model Context Protocol) サーバーへの接続情報
*   `browserSettings`: ブラウザの構成(ウィンドウサイズなど)

**プロンプトの内容(主要部分)**

1.  **自己紹介と役割定義**:
 *   `You are Cline, a highly skilled software engineer...`
 *   Clineが何者であるか(熟練したソフトウェアエンジニア)を定義し、AIのペルソナを設定します。

2.  **ツールの使用について**:
 *   `TOOL USE` セクションで、Clineが利用可能なツールの概念を説明します。
 *   重要な点として、「ユーザーの承認を得てからツールを実行する」「1つのメッセージにつき1つのツールを使用する」「前のツールの結果を基に次のツールを使用する」といった、逐次的なツール利用の原則を指示しています。

3.  **ツールの使用形式**:
 *   `Tool Use Formatting` セクションで、ツール使用時の厳密なXML形式を指示します。これにより、Clineからの指示をプログラムで確実に解析できるようにします。
 *   例:
     ```xml
     <execute_command>
     <command>npm run dev</command>
     <requires_approval>false</requires_approval>
     </execute_command>
     ```

4.  **利用可能なツールの説明**:
 *   `# Tools` セクションで、利用可能な各ツール (`execute_command`, `read_file`, `write_to_file`, `replace_in_file`, `search_files`, `list_files`, `list_code_definition_names`) について、以下の情報を詳細に説明します。
     *   **Description (説明)**: ツールの機能概要。
     *   **Parameters (パラメータ)**: 各ツールが受け取るパラメータとその説明(必須かどうかも含む)。
     *   **Usage (使用例)**: XML形式での具体的な使用例。
 *   `browser_action` (ブラウザ操作) については、`supportsComputerUse` が `true` の場合にのみプロンプトに含まれます。
 *   `use_mcp_tool`, `access_mcp_resource`(MCP関連) は `mcpHub.getMode()` が `"off"` でない場合のみプロンプトに含まれます。

5.  **ツールの使用に関するガイドライン**:
 *   「各ツール使用後にユーザーの確認を待つこと」「ツールの結果に基づいて次の行動を決めること」などを指示します。

6.  **システム情報**:
 *   `SYSTEM INFORMATION` セクションで、OS名、デフォルトシェル、ホームディレクトリ、現在の作業ディレクトリなどの情報を提供します。

7.  **目標**:
 *   `OBJECTIVE` セクションで、Clineの目標は「タスクを段階的に分解し、ツールを使いながら順序立てて問題を解決すること」であると明確化します。

8.  **ユーザ定義の追加指示**:
 *   `addUserInstructions`関数により、以下をsystem promptに追加できる
     *   ユーザーが設定したカスタム指示 (`customInstructions`)
     *   `.clinerules` ファイルの内容 (`clineRulesFileInstructions`)
     *   `.clineignore` ファイルの内容 (`clineIgnoreInstructions`)
     *   優先言語設定 (`preferredLanguageInstructions`)

9.  **PLAN MODEとACT MODE**
 *   ClineにはPLAN MODEとACT MODEの2つのモードがあること
 *   PLAN MODE では、`plan_mode_response`ツールを用いて、ユーザと対話的に計画を立てる
 *   ACT MODEでは、ツールを使ってタスクを実行する
 *   PLAN MODEで、ユーザーにACT MODEへの切り替えを促す際には、「ACT MODEに切り替えてください」と明確に指示し、自分で切り替えようとしないこと

**ポイント**

*   **XML形式のツール使用**:  Clineは、XML形式でツール使用を指示します。
*   **段階的な処理**: 複雑なタスクを小さなステップに分割し、1つのメッセージで1つのツールを使用し、結果を確認してから次に進むことを強調しています。
*   **ユーザーとの対話**: ユーザーからの承認、フィードバック、追加情報の要求など、ユーザーとの対話を重視しています。
*   **コンテキスト管理**:  `environment_details` で提供される情報(ファイル構造、開いているファイル、ターミナル出力など)を活用して、現在の状態を把握します。
*   **エラー処理**:  ツールの実行エラーや、ファイルアクセスエラーなど、エラー発生時の処理も考慮されています。
*   **拡張性**: MCP (Model Context Protocol) を通じて、カスタムツールを追加し、機能を拡張できます。

**まとめ**

Clineのシステムプロンプトは、AIアシスタントに具体的な役割、利用可能なツール、厳密な指示形式、作業手順、そしてユーザーとの対話方法を詳細に指示するものです。これにより、AIはVS Codeの機能を活用しながら、ユーザーのコーディングタスクを効果的に支援できます。
IGNORE_WHEN_COPYING_START content_copy download Use code with caution.
IGNORE_WHEN_COPYING_END
とのことです。自作AIエージェントのために非常に参考になります。
NotebookLMに入れたいが・・・
そもそもNotebookLMで同じことを再現できるのはないかと思いためしてみました。
NotebookLMはリンクで入れることもできるので正直uithubを使わなくてもと思ってやってみたのですが、やはり質問するとコードはわからないって返ってくるんです。
やっぱりuithub必要そうです。先ほど同様コードを1枚ペラにしてソースとするのが効果的です。
ではその1枚ペラをソースとして試してみようとテキストで入れるとClineだと最大制限に引っかかりました。じゃあGoogleドキュメントにコピペしてからドキュメントをソースとしようとしましたが今度はGoogle ドキュメントが固まりました(笑)
もちろん文字数少ないものであれば入ると思いますし、ソースコード全部じゃなくても仕様書だったりレジュメだけだったりは非常に便利なケースはあると思います。
Clineコード全部を入れるのはさすがに今のコンテキスト上限ではやりすぎで難しかったようです。Google AI Studioでできてるのでいったん諦めます。
まとめ
今後よりプロダクトが増えれば効率的に把握していかないといけない時代になります。
学習に使えるのはもちろんですが、IT犯罪対策としても可能性があるような気がしています。
そうなってくると一番わかりやすいのはプラットフォーム側(GitHub自体)チャットでコードを質問できるようにする。もしくはそういったコードを質問できるような専用サービスを「信用ある機関」が出してくる可能性もあると思っています。
もしくはプロダクトを評価して信用バッヂを提供する企業が出てきたり。それが有り無しで利用者が変わると謳うサービスとかです。
ただなぜ「信用ある機関」と申し上げたかというと、結局読み取る側の信用がなかった場合に結局本末転倒だからです。そうなると現在跋扈している、悪質な「でっち上げNo1商法」みたいなことになりかねません。提供できる企業や機関は絞られてくるだろうなと思います。


資料
ダウンロード
マスタデータのメンテナンスに関わる機能をまとめたSaaS「SMOOZ」
SMOOZはリレーショナルデータベースの課題を解決するサービスです。
オンラインデモで気軽に試すことが可能です。